Welcome to Our Community

Wanting to join the T-Bucket Forums discussions? Then sign up for a free forum account, today!

Sign Up

Ron Pope Motorsports                California Custom Roadsters               


Dismiss Notice
Thank you for visiting the T-Bucket Forums! This site was created in 2006, to provide enthusiasts with a place to discuss T-Buckets. Over the years, there have been many imitators, but this is the T-Bucket resource you have been looking to find. We encourage you to register a FREE account and join in on the discussions.

Big redo of the old bucket

Discussion in 'Project Plans & Updates' started by PotvinGuy, Feb 5, 2012.

  1. PotvinGuy

    PotvinGuy
    Expand Collapse
    Well-Known Member
    Staff Member

    Joined:
    Feb 22, 2008
    Messages:
    1,902
    Likes Received:
    833
    Gender:
    Male
    Occupation:
    Quantum Mechanic (semi-retired)
    OK, I'm gonna try to keep a diary here of the work on my bucket. It's been almost 20 years since built, and has gone thru 3 motors, several dash mods and minor upgrades, but I felt it was time for some real changes before I get too old to do it myself. First, a few pics of it before:
    [​IMG]
    [​IMG]
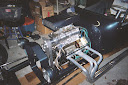
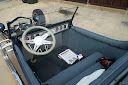
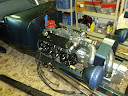
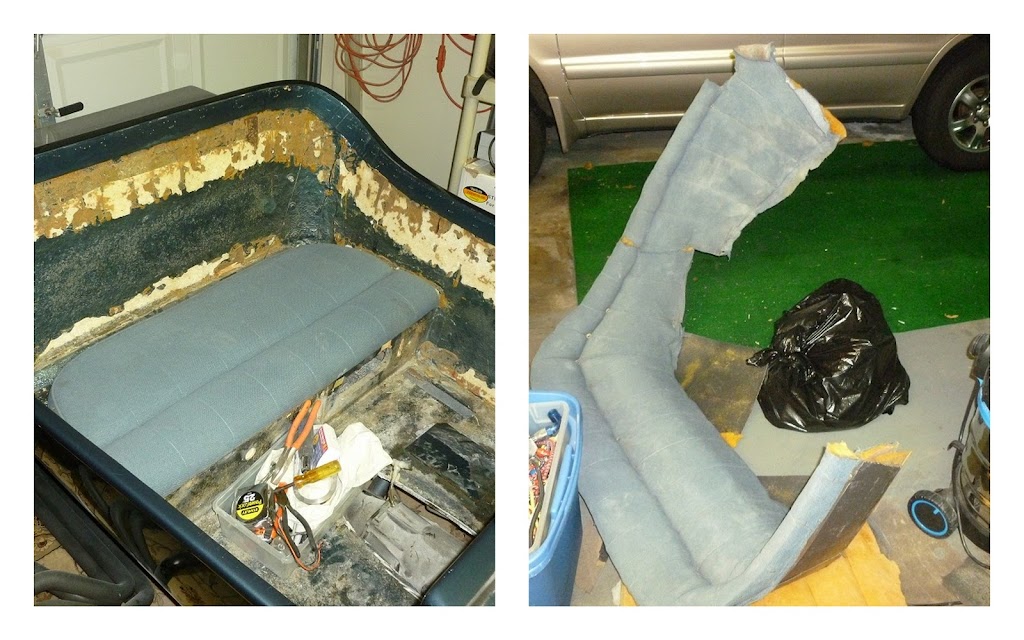
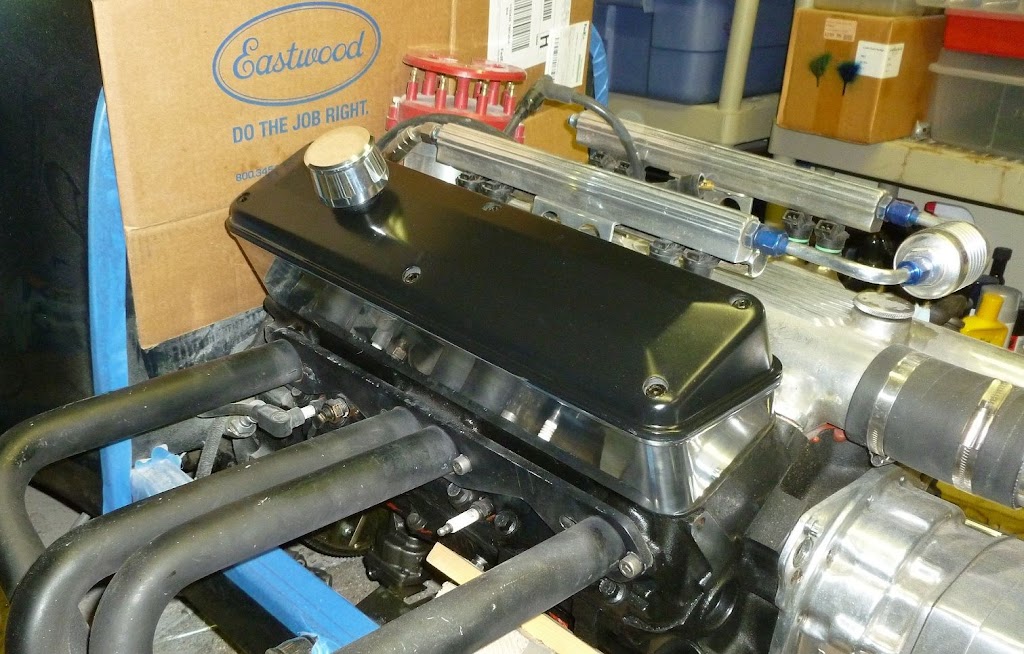
    Motor has a B&M 250 blower w/4bbl. Interior is original and getting a little ratty and was never very comfortable.

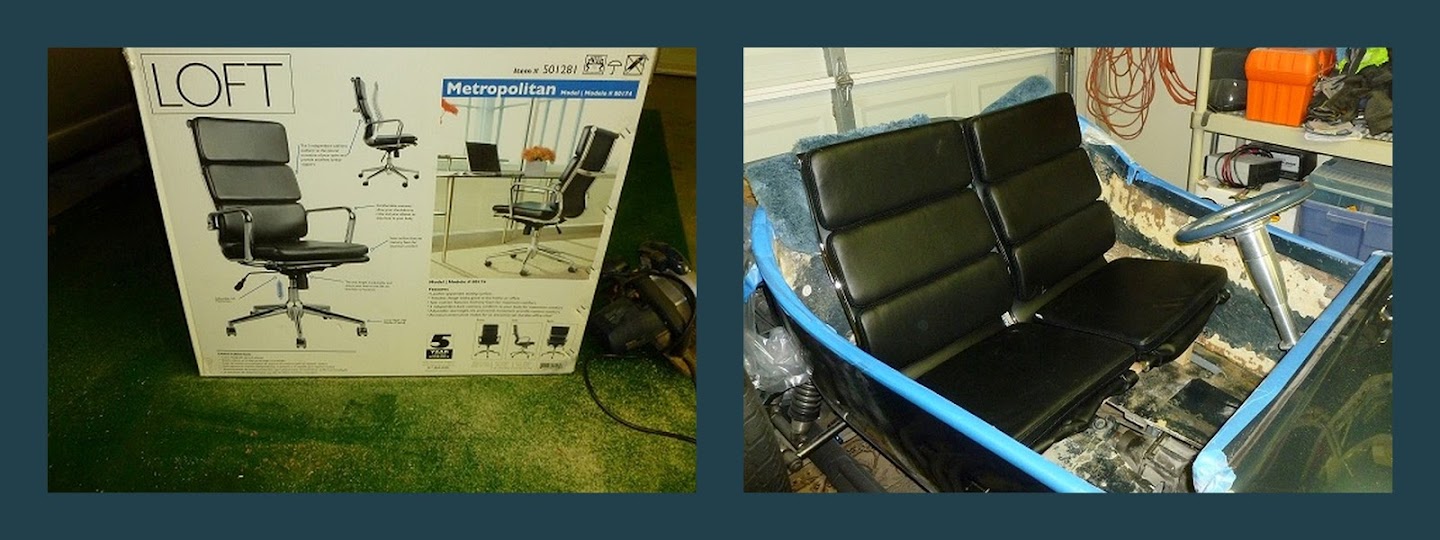
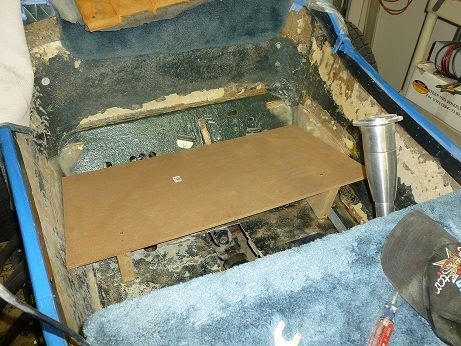
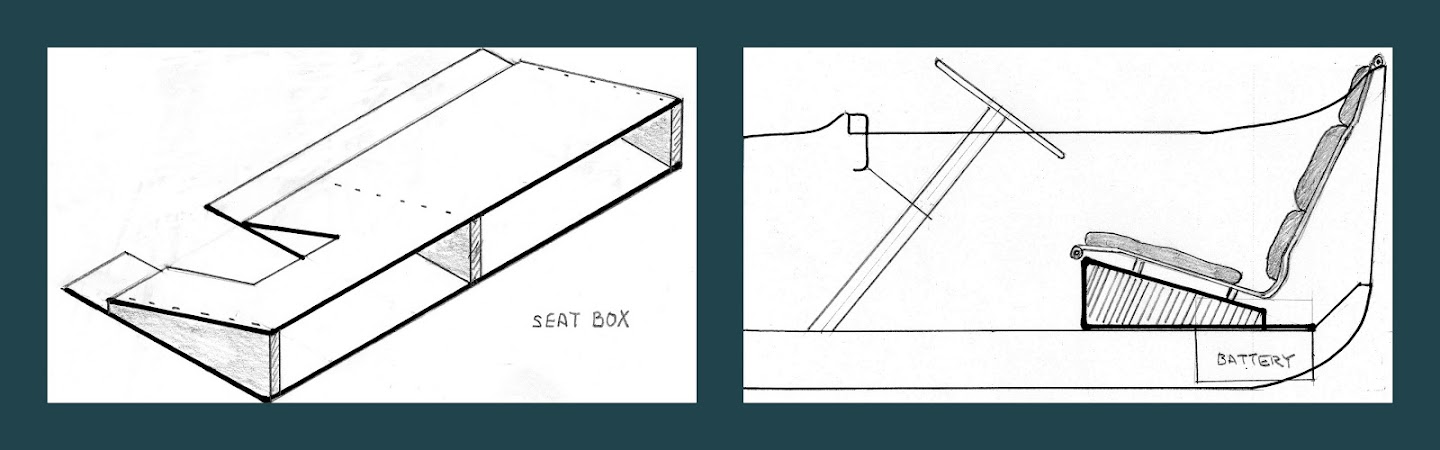
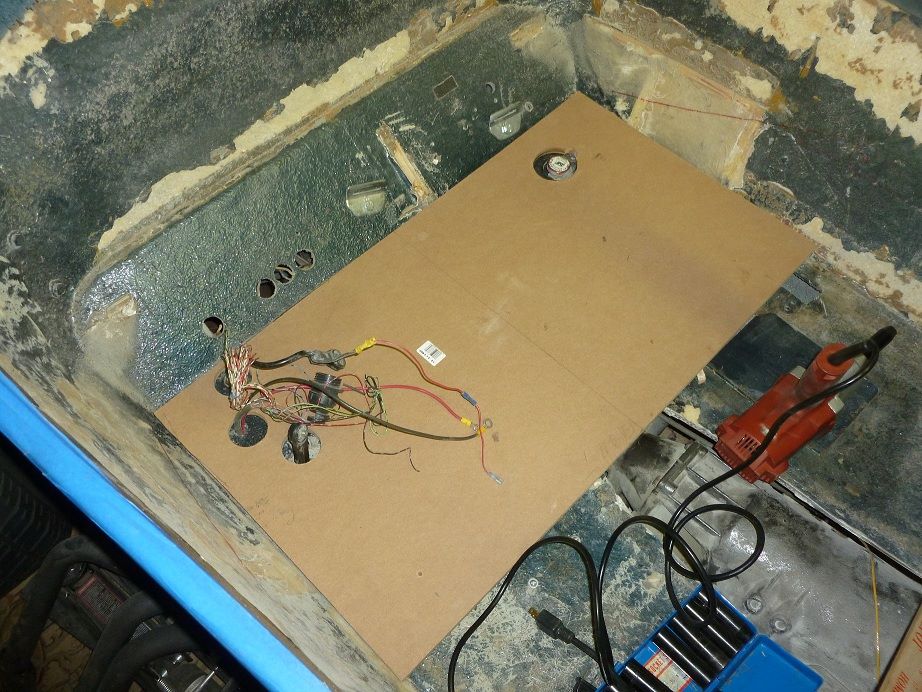
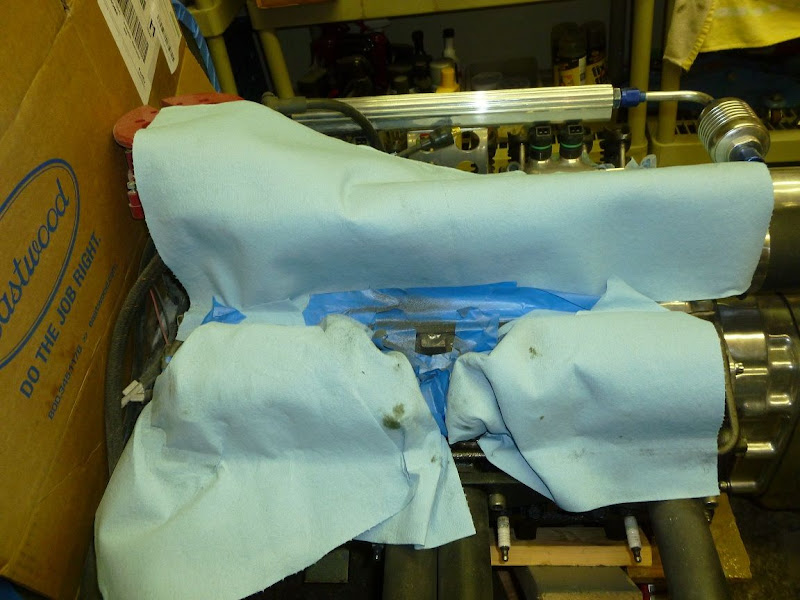
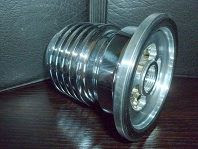
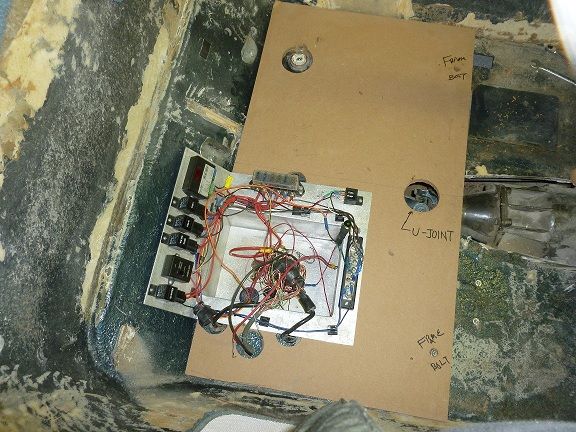
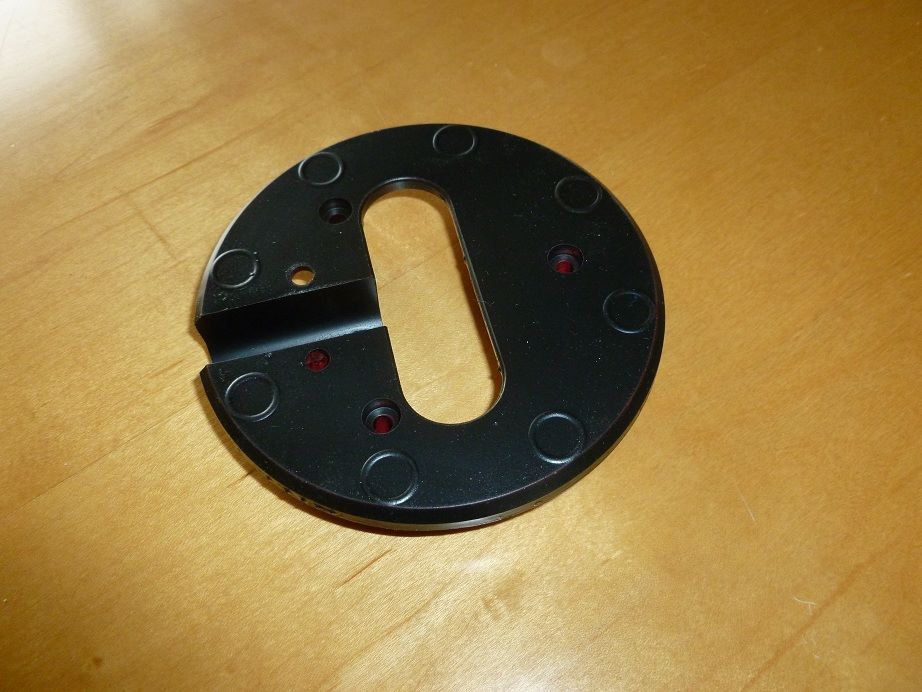
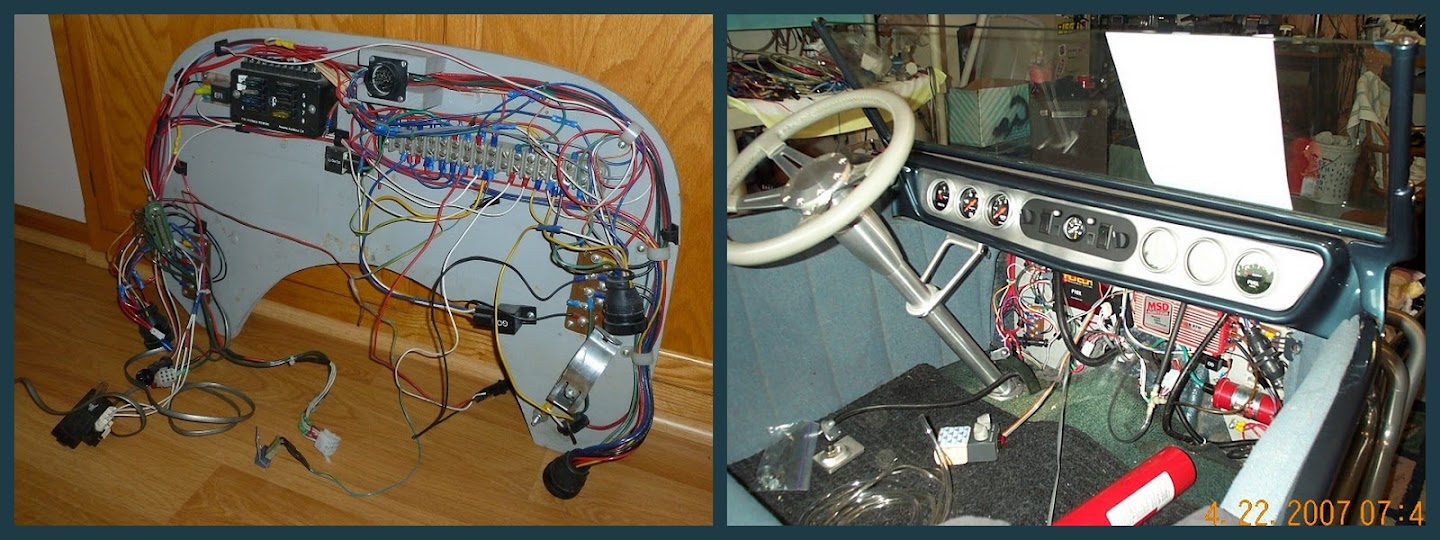
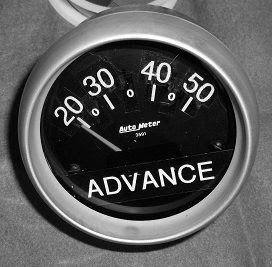
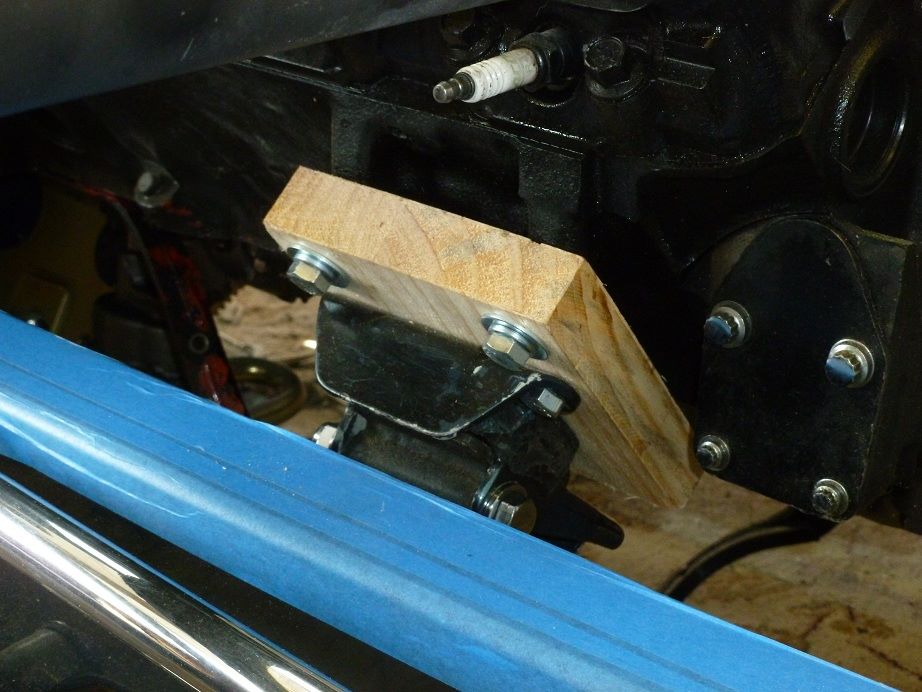
    The plan: 1) raise the motor and tranny about 1-1/2 inches, doubling the present ground clearance. Tired of banging pans. 2) replace the induction with a big Potvin blower and port EFI. I've had this system on the car several times, and this time it will have a new ECU and other upgrades. 3) New interior, with a different look and very ergonomic. 4) New electrical system.

    Hope to have it all done by cruise time here in MN. Have already started and will post more pics as work progresses.
     
  2. Youngster

    Youngster
    Expand Collapse
    VIP
    VIP Member

    Joined:
    Jan 1, 2008
    Messages:
    4,734
    Likes Received:
    22
    It's going to be fun to watch this rebuild.

    Ron
     
  3. PotvinGuy

    PotvinGuy
    Expand Collapse
    Well-Known Member
    Staff Member

    Joined:
    Feb 22, 2008
    Messages:
    1,902
    Likes Received:
    833
    Gender:
    Male
    Occupation:
    Quantum Mechanic (semi-retired)
    I'll be jumping around the project as I get the urge and the parts, so don't be surprised if one minute we're doing interior and the next electrical. To prepare for the project I removed the battery, drained all the fluids, pulled the oil pan and removed the windshield, dash and steering wheel. Taped all the body edges and covered everything I wasn't working on. First I wanted to raise the motor and tranny. To do that I'll rip up the rug and cut out the hump:
    [​IMG]

    The TH400 is a big unit, but has taken 20 years of abuse with no complaints, so I'll hang on to it. Next I remove the bolts on the tranny mount and the motor mounts, then situate jacks under the tailshaft and the first main bearing. The motor and tranny are parallel to the frame and I want to keep it that way, so I use a digital level (what a great gadget) to check the angles. To check clearances and looks, I'm temporarily hanging the Potvin/EFI on the motor:
    [​IMG]
    Before I removed the old induction, I marked the distributor and rotor to get the timing right later. Then start jacking... and I have to trim the floor opening to make room for the tranny. Note: fiberglass dust goes everywhere, so wear protection; I use a full-face respirator. And cover the wife's car or you will be punished. Checking the angles, and oops, the frame angle has changed? Yep, removing the weight of the motor/tranny has altered my reference angle. So I put some hardwood spacers in the 3 mounts and lower the weight back onto the frame. Check angles, jack up, more spacers, jack down, check angles and spacing, repeat as needed. I know a guy with a CNC mill (nice to have friends with benefits) who will whittle some nice pieces to replace the wood spacers.

    All the project pics will be at https://picasaweb.google.com/104971212334307682869/TBucket. Feel free to browse my other albums of car shows and stuff. And let me know if you have any shortcuts, tips, questions, know any crazy rod chicks in MN, etc. I'm winging lots of this and the collective wisdom of the bucketeers will be most welcome.
     
  4. PotvinGuy

    PotvinGuy
    Expand Collapse
    Well-Known Member
    Staff Member

    Joined:
    Feb 22, 2008
    Messages:
    1,902
    Likes Received:
    833
    Gender:
    Male
    Occupation:
    Quantum Mechanic (semi-retired)
    Suit up (heavy gloves, crowbar, pliers) to remove the interior. Pull, rip, and out it came:
    [​IMG]
    Then used chisels to remove the hardwood pieces that were glued to the body as anchors for the upholstery. To clean up the surface, I tried sandpapers until I found a disc that looks like a mutant Brillo pad:
    [​IMG]

    Chucked it in the die grinder and it eats fiberglass, glue and wood splinters like crazy. And it's cheap and doesn't clog like sandpaper.
     
  5. SCCustomRides

    SCCustomRides
    Expand Collapse
    Banned

    Joined:
    Jan 14, 2012
    Messages:
    116
    Likes Received:
    2
    I have been checking out this car for years on the web, I cant wait to see what you do to it next.
     
  6. Youngster

    Youngster
    Expand Collapse
    VIP
    VIP Member

    Joined:
    Jan 1, 2008
    Messages:
    4,734
    Likes Received:
    22
    Those disc's are great aren't they. Sent my daughter to the store for some flapper dosc's and that's what she came back with. They eat rust real good too.

    Ron
     
  7. PotvinGuy

    PotvinGuy
    Expand Collapse
    Well-Known Member
    Staff Member

    Joined:
    Feb 22, 2008
    Messages:
    1,902
    Likes Received:
    833
    Gender:
    Male
    Occupation:
    Quantum Mechanic (semi-retired)
    Thanks, I have a few surprises for you besides what I've said so far.
     
  8. bentbaggerlen

    bentbaggerlen
    Expand Collapse
    Member

    Joined:
    Aug 5, 2007
    Messages:
    179
    Likes Received:
    6
    I've used a buch of those disks on the coupe, its about the only thing that will take off the 87 year old laquer. Potvin blower... wow cool factor is off the charts
     
  9. PotvinGuy

    PotvinGuy
    Expand Collapse
    Well-Known Member
    Staff Member

    Joined:
    Feb 22, 2008
    Messages:
    1,902
    Likes Received:
    833
    Gender:
    Male
    Occupation:
    Quantum Mechanic (semi-retired)
    The old interior was well done, but the short flat bench seat wasn't comfortable; it was a long reach to the steering wheel, and all my weight was on my tailbone. And I was ready for a new look. I wanted bucket seats in my bucket, fancy that. I looked at TEA's, but a pair of their buckets start at $1300 in cloth. One day I was wandering around Sam's Club while the BW shopped, and I plopped down in an office chair. Hmm...feels good, modern leather and chrome, lumbar support, memory foam...$80 on sale? Leave off the arms and the swivel base...measured and two of them will fit the T like a T:

    [​IMG]


    I made a "fitment test appliance," or FTA in NASA-speak, but it just looks like a board to me:

    [​IMG]


    ...mounted a seat to it, sat in it and messed with the height, tilt and position until I was happy. Took dimensions to build the "cockpit restraint assembly, personnel," or CRAP (OK, I promise no more), a wood box glued, screwed and bolted to the body to support the two seats. The box will be 1/2" MDF top and bottom and 1x6 pine sides and supports:
    [​IMG]


    Will use 3M Marine Adhesive Sealant 5200, specialized for wood and fiberglass, to glue it to the floor and sides. There is a hole in the passenger side to access the battery in an aluminum box dropping beneath the floor. The space inside the seat box can hold gloves, tools, etc.
    I'm going to finish the body interior real smooth, primer and paint it with Eastwood's Chassis Black, a semi gloss which looks like black anodize and will be used on the motor too.
     
  10. Don'tCallMeJimmie

    Don'tCallMeJimmie
    Expand Collapse
    Member

    Joined:
    Jan 13, 2008
    Messages:
    248
    Likes Received:
    27
    Gender:
    Male
    Occupation:
    IT Engineering/Consulting Electronic Data Storage
    That right there is some creative "re-purposing" if I ever saw it. Hot rodding flows through your veins PotvinGuy, no question!
     
  11. Mike

    Mike
    Expand Collapse
    Well-Known Member

    Joined:
    Oct 23, 2006
    Messages:
    5,635
    Likes Received:
    514
    Gender:
    Male
    I like the re-purposing of the office chairs. It's a matter of keeping both an open mind and open eyes.
     
  12. PaulR

    PaulR
    Expand Collapse
    Member

    Joined:
    Dec 14, 2007
    Messages:
    304
    Likes Received:
    33
    Gender:
    Male
    Occupation:
    Piping Designer / Cad Coordinator
    PotvinGuy,
    I like the office chair idea. Something to keep in mind when I get my body. Looking forward to your progress.
     
  13. PotvinGuy

    PotvinGuy
    Expand Collapse
    Well-Known Member
    Staff Member

    Joined:
    Feb 22, 2008
    Messages:
    1,902
    Likes Received:
    833
    Gender:
    Male
    Occupation:
    Quantum Mechanic (semi-retired)
    Got the bottom of the seat box about ready:

    [​IMG]

    Hole at top is for brake proportioning valve, holes at bottom for cables and wires from dash and motor; they go thru the frame. A few more holes and I'll glue and bolt this piece in place.

    Moving to the motor, I've been saving these nice two-piece valve covers:

    [​IMG]

    Decided to install them. But even in SBC world, not everything is a bolt-on. The heads had some projections that hit the covers, so I had to grind those down. And to keep cast iron dust out of the motor, I had to mask it all off:
    [​IMG]

    Surgeons get big bucks for this kind of operation. Used a Dremel, the die grinder is too scary in such close quarters.

    [​IMG]

    All put together:

    [​IMG]

    Painted the top half Eastwood Chassis Black. I like the contrast with the polished bottom. Gonna make the whole motor black & aluminum. How about those trick wood motor mounts?

    Coming attractions: been saving this billet oil filter:

    [​IMG]

    It has a SS mesh inside, you just rinse it out and put it back on.
     
  14. RazzBarlow7

    RazzBarlow7
    Expand Collapse
    New Member

    Joined:
    Feb 14, 2012
    Messages:
    44
    Likes Received:
    1
    Gender:
    Male
    Occupation:
    Service Manager
    I like those valve covers! Nice work. Thanks for the photos and the update.
     
  15. PotvinGuy

    PotvinGuy
    Expand Collapse
    Well-Known Member
    Staff Member

    Joined:
    Feb 22, 2008
    Messages:
    1,902
    Likes Received:
    833
    Gender:
    Male
    Occupation:
    Quantum Mechanic (semi-retired)
    Decided to reuse some of the electrical system to save time (can't miss the first cruise!):

    [​IMG]

    Cut a hole for the u-joint, since it is slightly higher than the floor now. And two holes for body/frame bolts that will now also grip the seat box.
     
  16. PotvinGuy

    PotvinGuy
    Expand Collapse
    Well-Known Member
    Staff Member

    Joined:
    Feb 22, 2008
    Messages:
    1,902
    Likes Received:
    833
    Gender:
    Male
    Occupation:
    Quantum Mechanic (semi-retired)
    Quick update. In my quest to remove all color from the motor, I coated the red distributor wire retainer with Plasti Dip:

    [​IMG]

    It will need another coat. It's a rubber coating, like you might put on tool handles, comes in a spray can.

    Here's the old electrical panel, which was under the dash against the firewall and hidden by a false interior firewall:

    [​IMG]

    I have to transfer all the functionality, plus some new stuff, to a new panel behind the seats. I'll reuse the interior firewall as a toe board.
     
  17. PotvinGuy

    PotvinGuy
    Expand Collapse
    Well-Known Member
    Staff Member

    Joined:
    Feb 22, 2008
    Messages:
    1,902
    Likes Received:
    833
    Gender:
    Male
    Occupation:
    Quantum Mechanic (semi-retired)
    Here's something you don't see every day:
    [​IMG]

    I think I attached a PDF that explains it. If not, you'll have to wait until I get smarter...it could be a very long wait.

    New motor mounts:
    [​IMG]

    This is destined to be the next big craze. I've decided to make a limited run of these for those of discriminating taste. Pine is standard, but cherry, mahogany or any other wood can be had for a very large additional charge.

    I almost threw out the bases of the office chairs, but had an idea while trying to squat (67 isn't the new 30) to work on the car. Cut a circle of MDF and mounted it to a base:

    [​IMG]

    Added a lip to hold a magnetic cup and a few holes for tools, and presto! A custom shop stool with adjustable height.
     
    Randy Steel and engineboy like this.
  18. PotvinGuy

    PotvinGuy
    Expand Collapse
    Well-Known Member
    Staff Member

    Joined:
    Feb 22, 2008
    Messages:
    1,902
    Likes Received:
    833
    Gender:
    Male
    Occupation:
    Quantum Mechanic (semi-retired)

    Attached Files:

  19. donsrods

    donsrods
    Expand Collapse
    Member

    Joined:
    Feb 8, 2008
    Messages:
    1,454
    Likes Received:
    48
    Gender:
    Male
    Where is the beer holder on that seat ? :)

    Don
     
  20. PotvinGuy

    PotvinGuy
    Expand Collapse
    Well-Known Member
    Staff Member

    Joined:
    Feb 22, 2008
    Messages:
    1,902
    Likes Received:
    833
    Gender:
    Male
    Occupation:
    Quantum Mechanic (semi-retired)
    I knew I forgot something! Check my next post.
     

Share This Page


Advertise with Us! Advertise with Us! Advertise with Us!

SSL Certificate